Import the package
Import the Starter Package
For this tutorial, we've provided a starter package that contains prefabs and scripts that will expedite some parts of the tutorial so you can focus on how to use plane detection feature in NRSDK.
1.Download the Plane Detection Starter Package:
PlaneDetectionStarterPackage.unitypackage
- Install the starter package by opening Assets > Import Package > Custom Package... and opening
PlaneDetectionStarterPackage.unitypackage. - In the window that pops up, ensure everything is selected.
- Click Import.
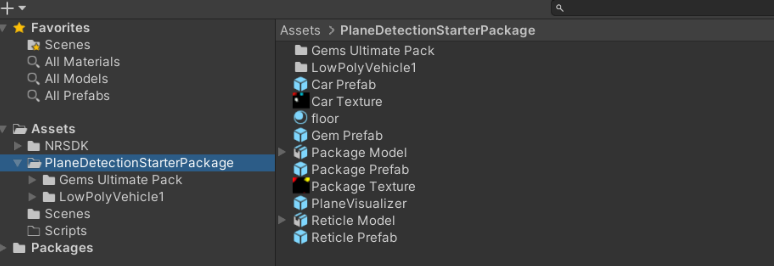
- After importing NRSDK and plane detection starter package, your project folder should look like this:
Add the required scene elements
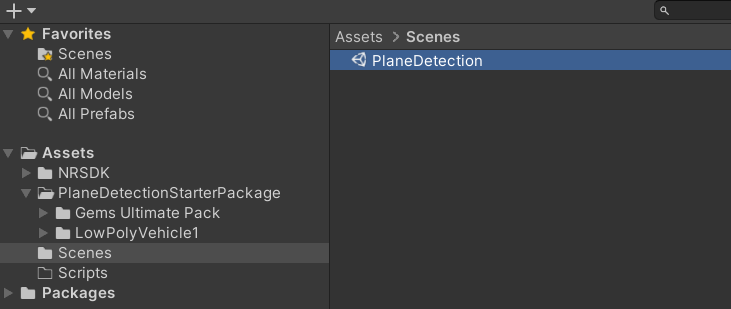
- In
Assets > Scenefolder, rename the SampleScene to PlaneDetection
-
In the project hierarchy, delete
MainCamera, search in the project panel and drag inNRInputandNRCameraRigprefab (located inAssets > NRSDK > Prefabs) in the hierarchy. Your hierarchy should look like this: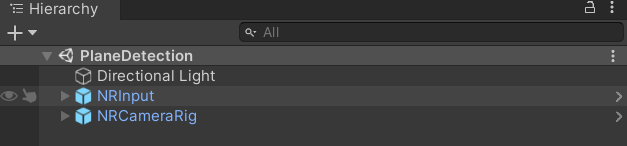
-
Click
NRInputin Hierarchy, make sure it is configured as following in the inspector. Specifically,Raycast Modeset toLaser, andInput Source TypetoController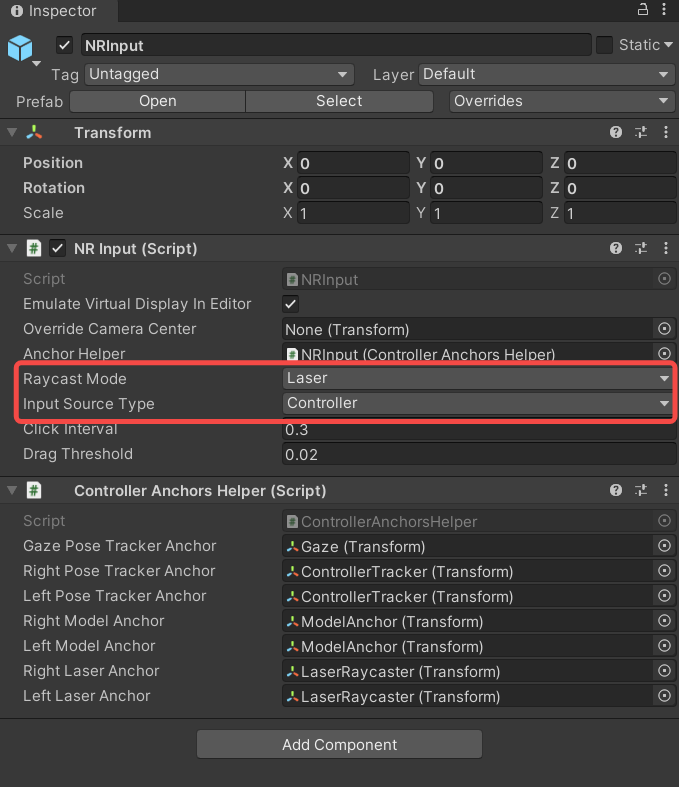
-
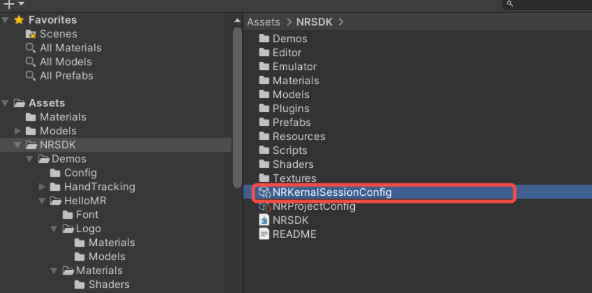
Click
NRCameraRig, then clickNRKernalSessionConfiginNR Session Behaviourcomponent to findNRKernalSessionConfigconfiguration. Click theNRKernalSessionConfigfile appeared in the project folder. You could also locateNRKernalSessionConfiginAssets/NRSDK

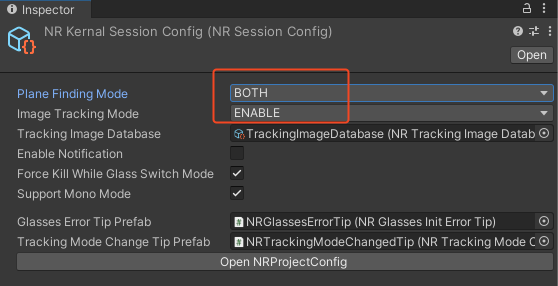
- In
NR Kernal Session Configpanel, activatePlane Finding ModeandImage Tracking Modeis activated as follows.
Verify the setup
-
Search and Drag
NRLogo(located inAssets/NRSDK/Demos/HelloMR/Logo/Models/NRLogo.prefab) into the hierarchy. -
Ensure your Android phone is plugged in or connected through Wi-Fi for ADB debugging.
-
Follows Step 7 and Step 8 in Getting Started with NRSDK to test if your app built with the current environment runs properly.
-
You should see XREAL logo (
NRLogo) appeared on the glasses.