Display Stability
In rendering, we may encounter various display stability issues, including visual artifacts and motion-related problems. These can manifest as tearing, swim, judder, and drift. This document primarily introduces common display stability challenges and how to address them in XREAL SDK.
Display artifacts
-
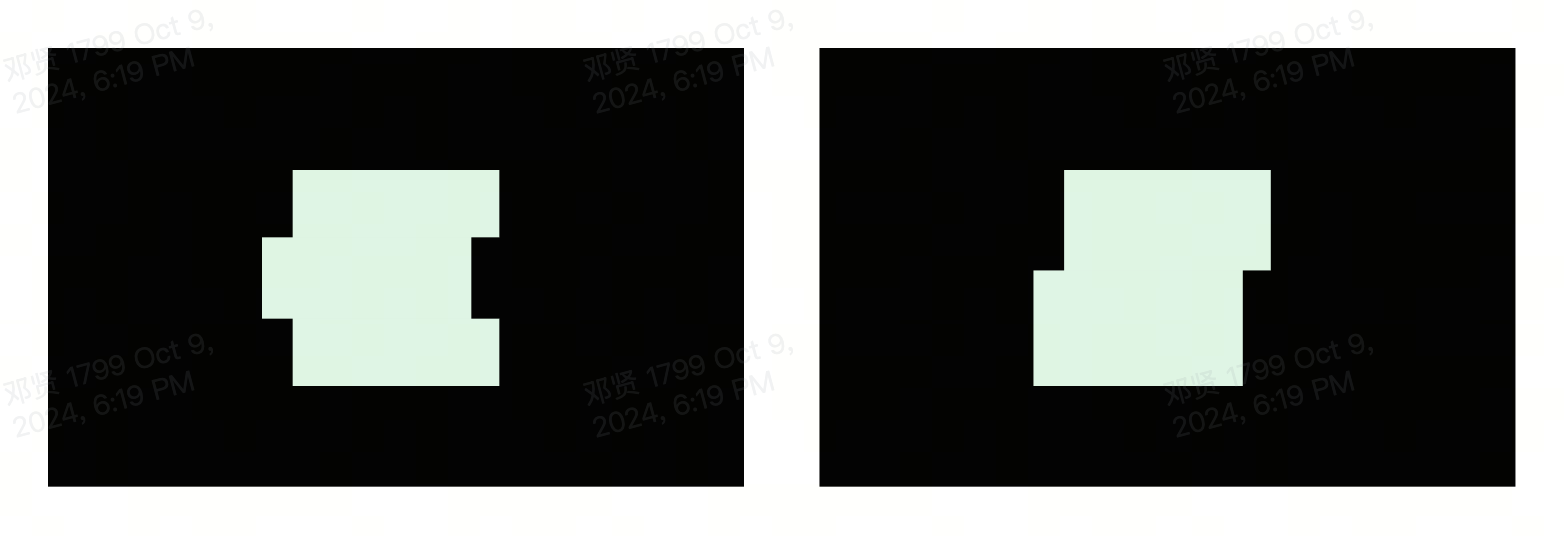
Tearing refers to the discontinuity in the display during the rendering process, usually manifesting as one or more lines in the image, often black, making it appear as if the screen has been torn. This phenomenon is mainly caused by high CPU or GPU usage. If developers encounter this issue, they can use the Render metrics tool to analyze CPU and GPU usage specifically, and then perform further performance optimization.

-
Swim refers to the phenomenon where virtual objects appear to sway with the user's head movement. This situation is mainly caused by calibration issues.
-
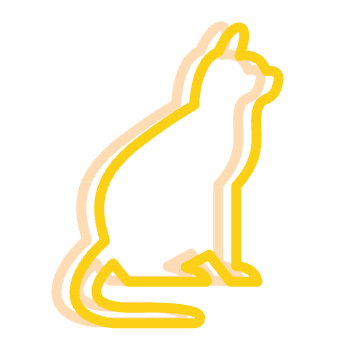
Judder is a display artifact characterized by uneven motion and double images of virtual contents, particularly noticeable in moving virtual objects. It mainly occurs due to low frame rate and improper reprojection, resulting in inconsistent frame delivery.

-
Drift refers to the slow offset of virtual objects or environments relative to their real-world positions. This phenomenon is primarily a head tracking issue, which can be caused by several factors:
- Lack of environmental textures: Environments with plain, featureless surfaces can make it difficult for the tracking system to maintain accurate positioning.
- Poor lighting conditions: Extremely bright, dark, or rapidly changing lighting can interfere with the tracking system's ability to detect and track features.
- High dynamic environments: Rapidly moving objects or people in the scene can confuse the tracking system, leading to drift.
To achieve good tracking performance and minimize drift, consider the following:
- Ensure the environment has sufficient visual features or textures for the tracking system to latch onto.
- Maintain consistent and adequate lighting conditions.
- Avoid extremely dynamic environments when possible.
Solutions
Frame rate
Improving and stabilizing frame rate is key to solving various jittering problems. XREAL SDK recommends developers to:
- Maintain a stable 60fps or higher frame rate whenever possible
- Optimize scenes and resources to reduce per-frame computational load
- Refer to some suggestions given by Unity: Optimizing your VR/AR experiences
Render distance
Render distance refers to the distance from the camera (or user's viewpoint) to the rendered object in a 3D scene. In AR/VR applications, setting appropriate render distances is crucial for improving display stability and performance optimization. Generally, render distances should be set according to the following principles:
- Short distance (0.5m - 1m): Suitable for handheld or close-interaction objects.
- Medium distance (1m - 5m): Suitable for most objects in indoor scenes or close environments.
- Long distance (over 5m): Suitable for background objects in outdoor scenes or large environments.
For most AR applications, setting the render distance of main interactive objects between 1.4m to 3m usually achieves good results. This range ensures object clarity without putting too much rendering burden on the system.
Reprojection
Reprojection is a technique used to reduce latency and improve display stability. Its basic principle is to adjust the image based on the latest head position information after rendering and before display. This technique can alleviate jittering problems to some extent because it considers changes in motion and viewpoint (HeadPose) during scene animation and user head movement. Reprojection can compensate for latency generated during the rendering process, making the displayed image more consistent with the user's current head position and orientation. Planar Reprojection is a commonly used reprojection technique. Its core idea is to define a stable plane in 3D space, where the content on this plane will become the most stable part of the scene. The further virtual content is from this plane, the worse its stability. This method allows applications to precisely control the stability of different parts of the scene. In XREAL SDK, there are several ways to use planar reprojection:
-
Default Planar Reprojection: If the application doesn't do any processing, the system will use planar reprojection by default, fixing the stable plane at 1.4 meters in the direction of the user's head. While this default setting provides a starting point, it may not always yield optimal results for all scenarios.
-
Manual Planar Reprojection: Developers can use the API NRFrame.SetFocusPlane to manually set the information of the stable plane. This method gives developers maximum control and allows optimization of stability based on specific scene requirements.
-
Automatic Planar Reprojection: Developers can use the FocusManager component to implement automatic planar reprojection. The specific principle is:
FocusManager performs the following operations in each frame:
- Executes Physics.Raycast from the head center along the forward direction to obtain the hit target.
- Provides plane information to the XREAL SDK runtime based on the hit target.
To ensure Automatic Planar Reprojection works correctly, make sure that the Physics.Raycast can hit the visual object in the scene. Which means:
- You must attach an appropriate collider to the visual gameobject;
- In the current XREAL SDK implementation, FocusManager performs a raycast with a max distance of 100 meters. If your visual gameobject is placed beyond this distance, you can modify the maxDistance to fit your needs.
Choosing the appropriate reprojection method is crucial for improving the display stability of AR applications. Developers should decide which method to use based on the specific needs of the application and scene characteristics, and optimize accordingly.
Practice: Display Stability Optimization
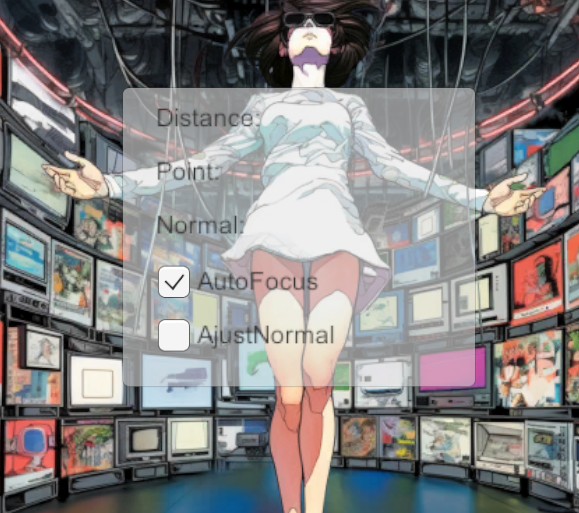
Developers can experiment with and optimize planar reprojection and frame rate effects on display stability in the FocusPlane scene:

-
Real-time Data Monitoring:
- The panel displays the current render distance, focal plane normal in real-time.
- This data is crucial for in-depth understanding and precise debugging of render distances.
-
Render Distance Adjustment:
- Enable AutoFocusDist, and the system will automatically adjust the render distance, implementing automatic planar reprojection. When enabled, the indicator sphere in the scene will automatically move to the current focus distance position.
-
Normal Direction Adjustment:
- AutoFocusNorm: When enabled, the system will automatically adjust the normal direction of the plane.
- When disabled, the plane normal direction is fixed at (0,0,-1).
- Recommendation: For scenes dominated by planes, enable this option; for scenes with many irregular objects, it's recommended to disable it.
-
Reference Plane Setting:
- Use the Dist button to set the reference plane, which may affect the behavior of the auto-focus system.
By systematically adjusting these parameters, developers can comprehensively evaluate and optimize the display stability of AR applications, thereby providing a smoother and more immersive user experience.